Welcome readers, this is my very first D.I.Y tutorial blog post so you will have to bare with me and please feel free to give me any constructive feedback regarding the instructions below.
This summer my family and I decided that getting a pool gate installed around our pool was an absolute must. When we purchased our home 5+ years ago it had a pool that had been emptied and covered with tons of lumber, chicken-wire and plastic sheeting. We didn’t know what we wanted to do with this “deathtrap” until last spring (2016) when we decided to take the plunge and have the whole thing renovated/remodeled. The pool had originally been built in the 80’s and had a super deep diving end and a really small shallow end. Through much consideration and the opinions of many, we decided to go ahead and have the pool converted from a dangerous diving pool to a much more usable play-pool with the deepest point in the center at about 5′ deep. Anyhow, our pool was completed by the beginning of last summer, just in time for the third trimester of my pregnancy. We decided to hold off on putting in a pool fence until we could redo the landscaping around the pool. Our 10 year old daughter is a decent swimmer and also has the ability to stand with her head out of water anywhere in the “new” pool. I know that a drowning can happen in even the most shallow of waters and to experienced swimmers but we also watch our child like a hawk and is never unsupervised. We also had a motion sensor activated security camera put in as an extra precaution. There I go getting sidetracked again, I swear I will reach the point to this pool valet and towel rack VERY SOON. Alright, fast forward to early spring this year, our son was on his way to crawling and being far more mobile, we still didn’t get around to doing the landscaping around the pool, but it was time to get a pool barrier/fence installed. We decided to go with the removable mesh fencing due to having the ability to remove it easily if and when we get around to the landscaping, plus it is supposedly safer because there is no rigid horizontal top that makes climbing over easier for kiddos. I know this sounds silly but the one major downside that we found with this style of fencing is that you cannot hang your towels over the top to help them dry and keep them off of the ground (it voids the warranty and can damage the top). We were planning our first pool party and wanted to make sure there was a place for people to hang their towels so that they wouldn’t be tempted to hang them on the fence, PLUS, having easy and quick access to a towel right next to the pool is a perk.
I feel that working with PVC is inexpensive, quick and easy. For this project it is far more economical to purchase the 10′ lengths of PVC and cut them down yourself, you will have left over PVC that you can use for other future projects.
What you will need:
- Chop saw, hand saw, hacksaw or pipe cutter (we actually used both a chop saw then went out and bought a pipe cutter for under $10 because my husband likes having a tool for everything and it made the project a lot easier and less messy)
- Clear PVC Adhesive (you use whatever color you like or if you already have some on hand, we just like the way the clear looks)
- Tape Measure
- Acetone (for removing the printed on bar codes and labels from the PVC, not necessary but it will look better in my opinion)
- Rags (for cleaning the PVC with the acetone)
- 120″ of 1″ white PVC (We purchased two 10 foot lengths so that we had extra in case of mistakes or additional loss of length with each cut)
- 133″ of 1 1/4″ white PVC (two 10 foot lengths or one 10 foot piece and one 5 foot piece)
- 4 – 1 1/4″ PVC elbows
- 3 – 1 1/4″ PVC “T” connectors
- 2 – 1″ PVC cross/x connectors
- 1 – 1″ PVC “T” connector
- 6 – 1″ PVC caps
Getting Started
1. If you are removing the printed on labels from the PVC do this now by using a clean rag and your acetone, it may take a few passes to fully remove the ink.
2. Measure and cut all of your PVC pieces (measure twice and cut once) the 1 1/4″ PVC is used on the base and the 1″ PVC is for the rack
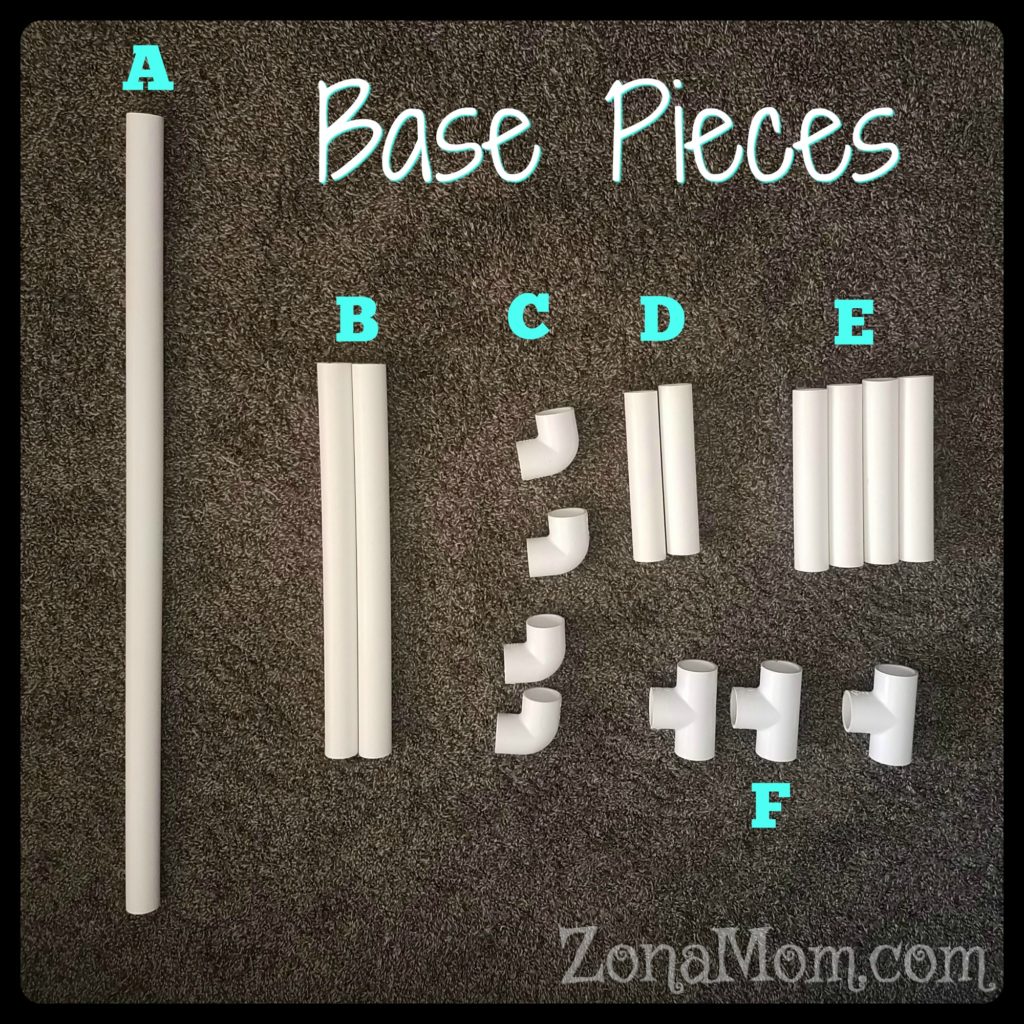
You should have the following parts to work with for your stand base after you are done cutting your longer lengths of 1 1/4″PVC…
 PART  A- 1x 40" length of 1 1/4" PVC
 PARTS B- 2x 20" lengths of 1 1/4" PVC
 PARTS C- 4x 1 1/4" PVC elbow connectors
 PARTS D- 2x 8 1/2" lengths of 1 1/4" PVC
 PARTS E- 4x 9" lengths of 1 1/4" PVC
 PARTS F- 3x 1 1/4" PVC T connectors
I highly recommend doing a “dry fit” to make sure that all of your parts/pieces are fitting together properly before using the PVC glue.
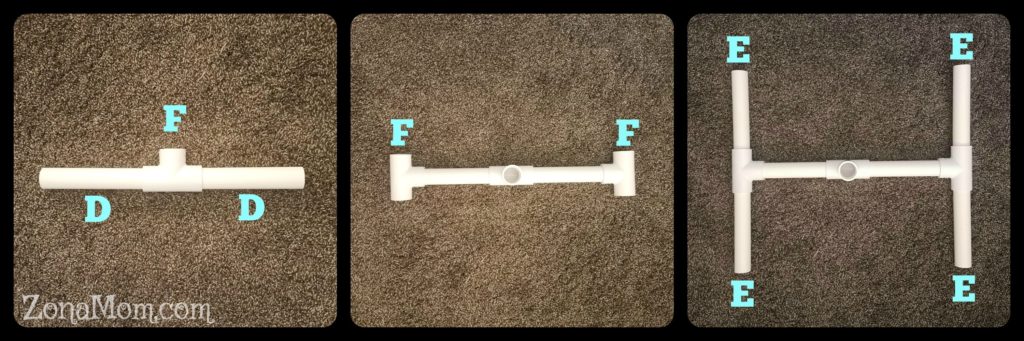
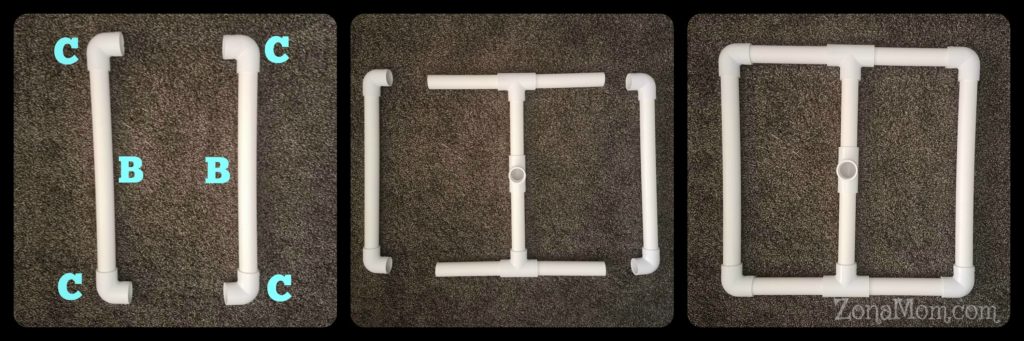
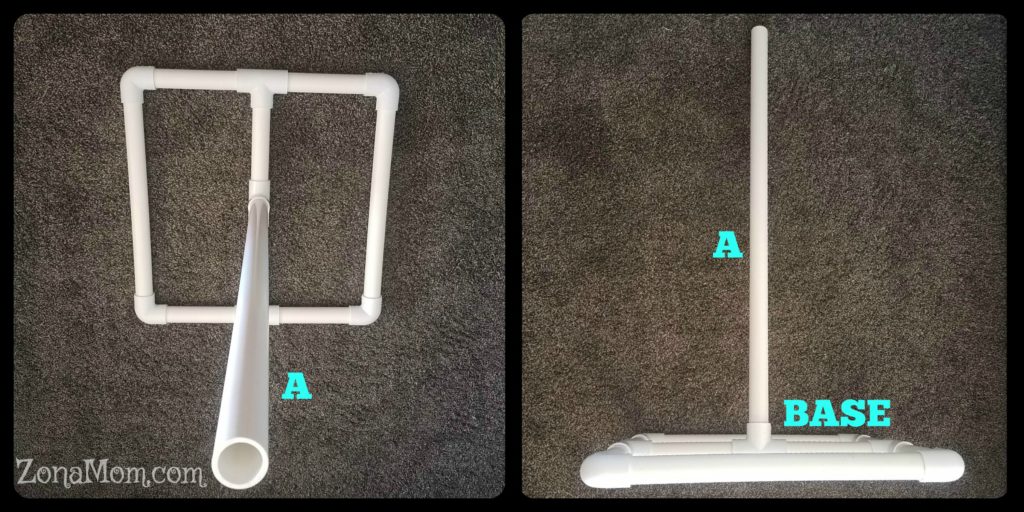
3. Once we were sure that it all fit well together we pulled it apart and used the PVC adhesive on every joint on the base but did not glue the 40″ vertical piece. We wanted to be able to remove it for easier storage when not in use.
You should have the following parts to work with for your towel rack after you are done cutting your longer lengths of 1″ PVC…
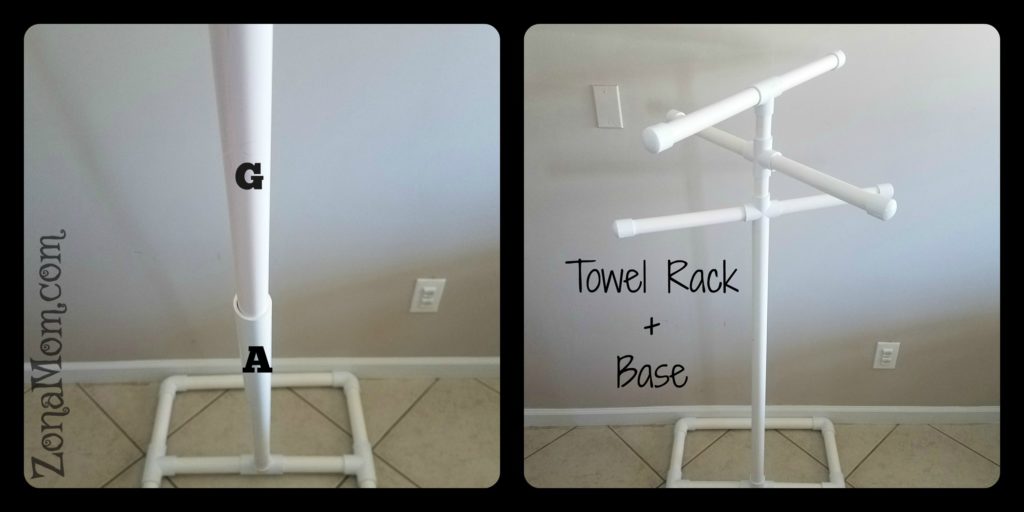
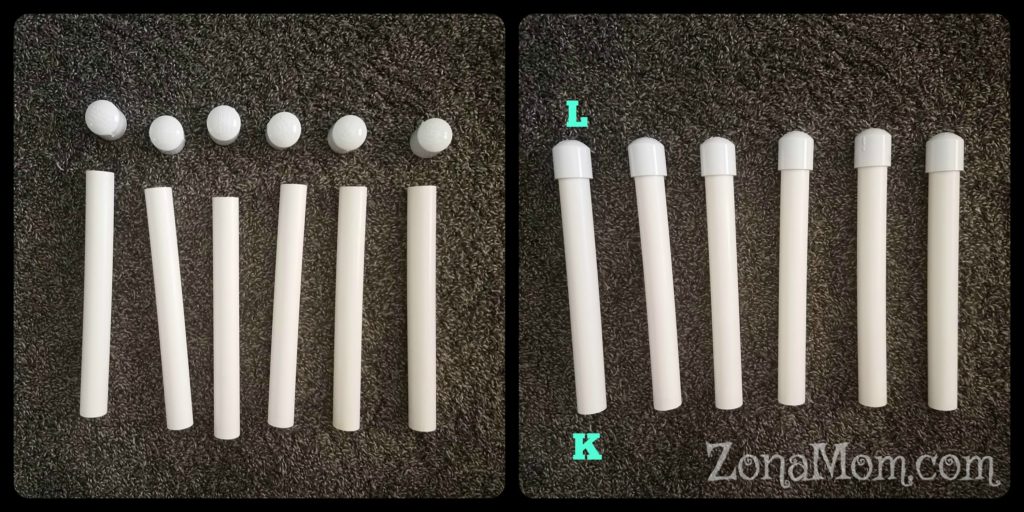
 PART  G- 1x 42" length of 1" PVC
 PARTS H- 2x 1" PVC cross or x connectors
 PARTS I- 2x 3" lengths of 1" PVC
 PARTS J- 1x 1" PVC T connector
 PARTS K- 6x 12" lengths of 1" PVC
 PARTS L- 6x 1" PVC caps
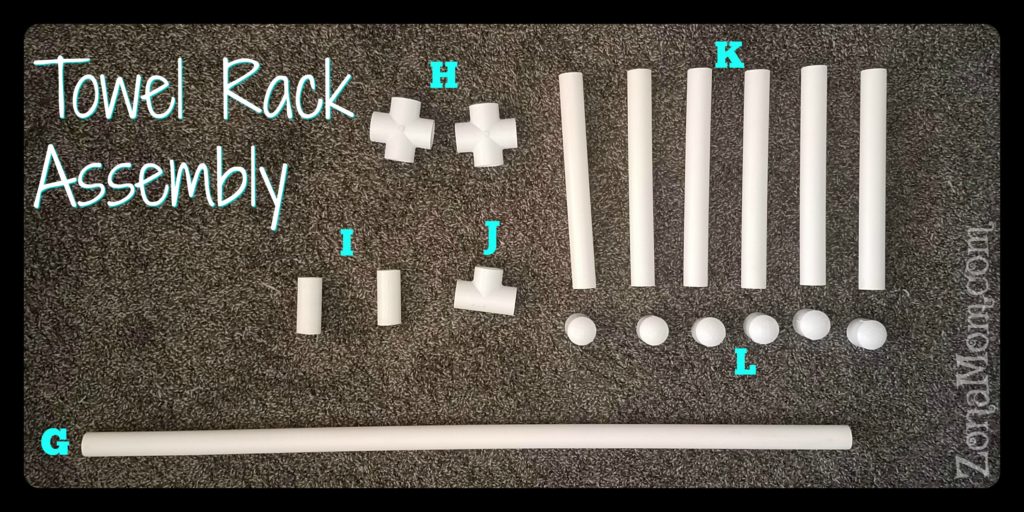
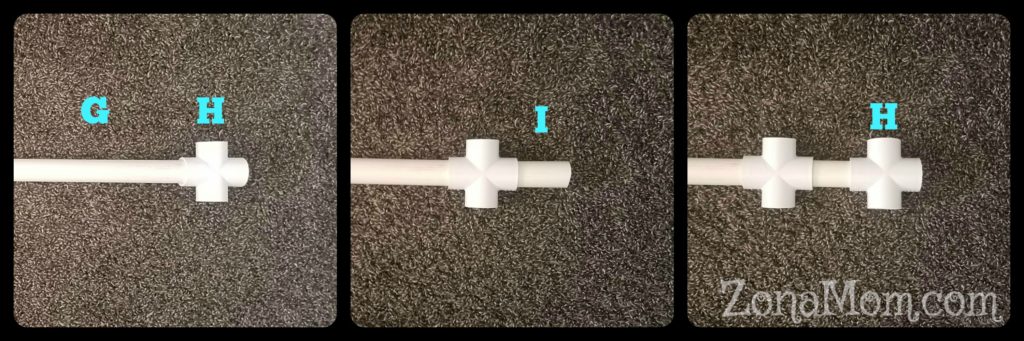
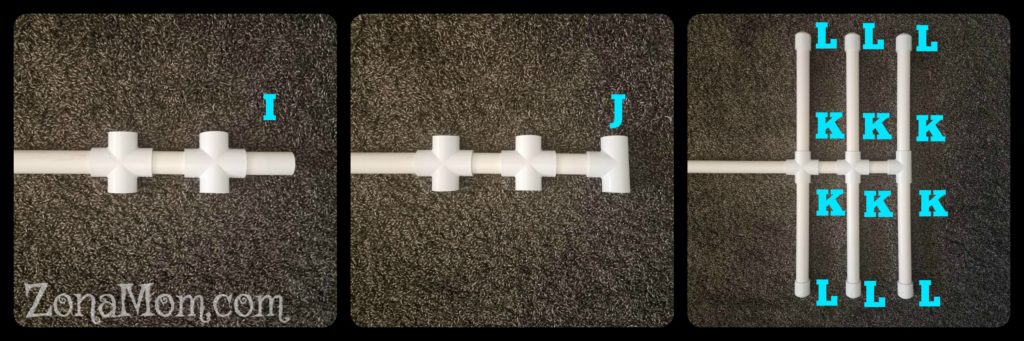
4. Once again after doing a dry fit to ensure that everything is fitting together well, pull out the good ole’ PVC adhesive and glue the “K” pieces aka “the arms” to the “H” and “J” pieces. We left the rest un-glued for the ease of storing, if this is not a concern for you and you would prefer to glue the whole thing together… go crazy, just don’t get high off of all of those fumes.
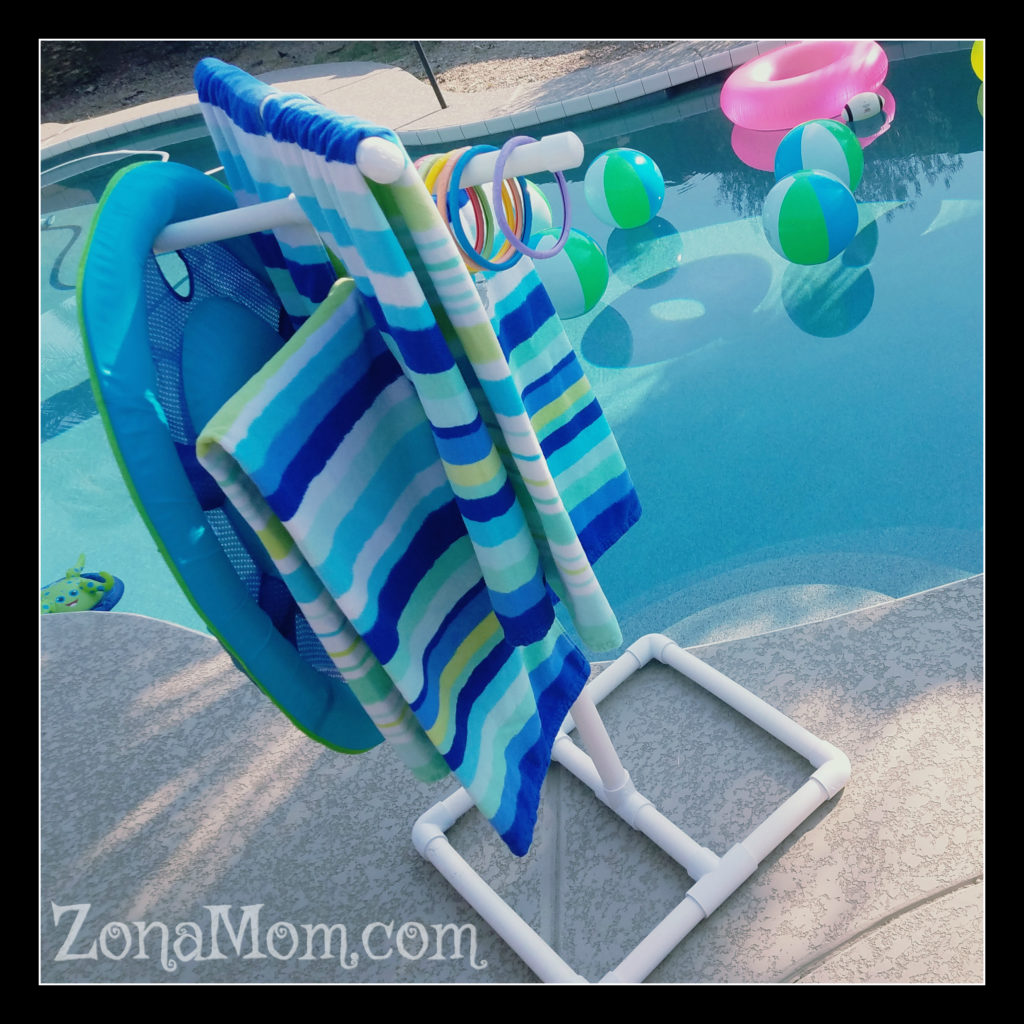
5. Now go on ahead and slip the “G” piece into the “A” piece and VOILA you are all done and ready to load it up with towels and floaties!!!