Hello Readers! I am sure you know this but, shiplap walls are soooo hot right now. In fact that might be the reason you found yourself in this neck of the internet. If you are wanting to put some shiplap in your home, check out where we started with our shiplap wall makeover. Who knows, this post may inspire you to do something similar…
A little bit of backstory…
As you may already know from my other posts, my family purchased a new home two years ago. Shortly after moving into our home (whilst having some home projects in mind) we found out we were having another baby, YAY! BUT… pregnancy has it limitations and tackling some of these projects weren’t going to happen.
Well, now that I am pretty much recovered from my pregnancy and hernia surgery, we are taking on these projects. This one was actually done about a year ago, but I am just now getting around to posting it. We are calling it our $500 and under projects. This post is all about our foyer, so here goes…
*Please note: This blog post contains affiliate links, which means that if you make a purchase using one of these links, at no additional cost to you, I may receive a commission from those purchases. You can read my full disclosure here.
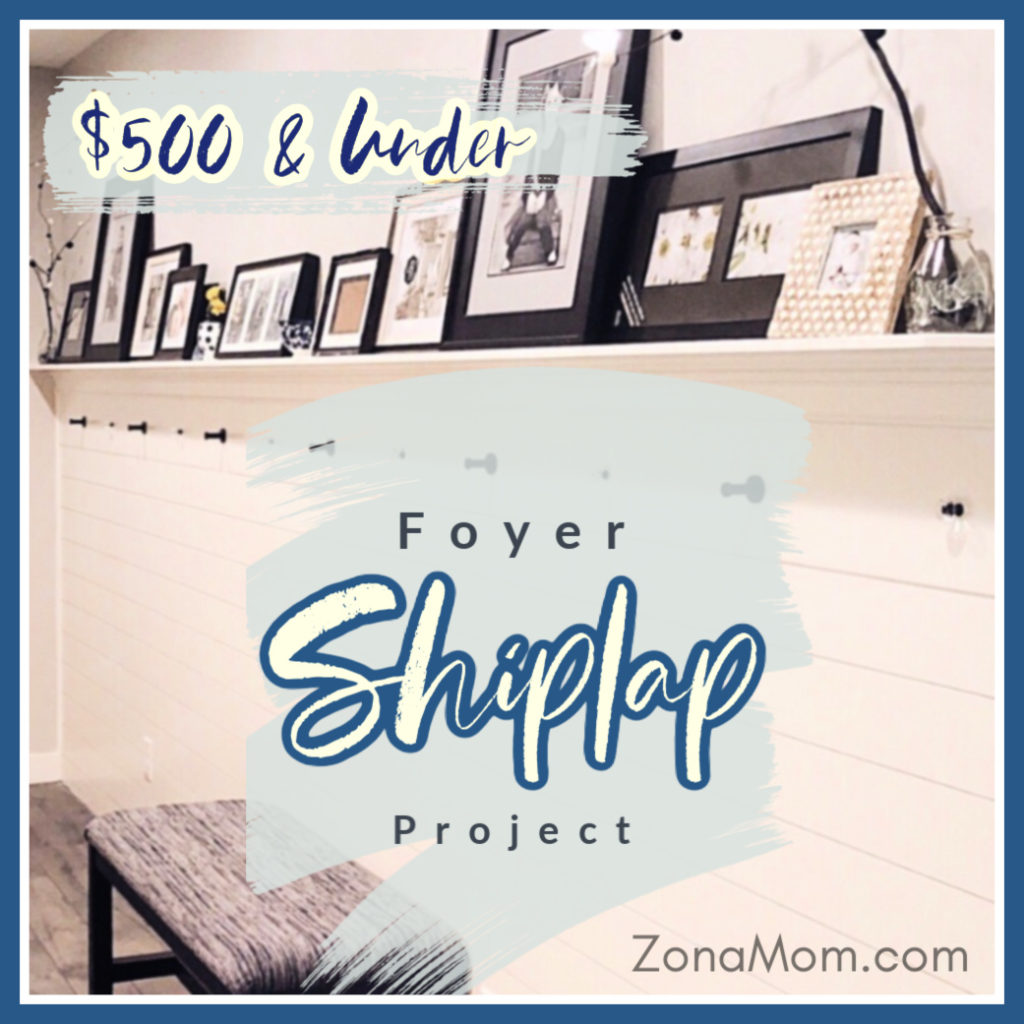
Our Foyer Shiplap Wall transformation under $500
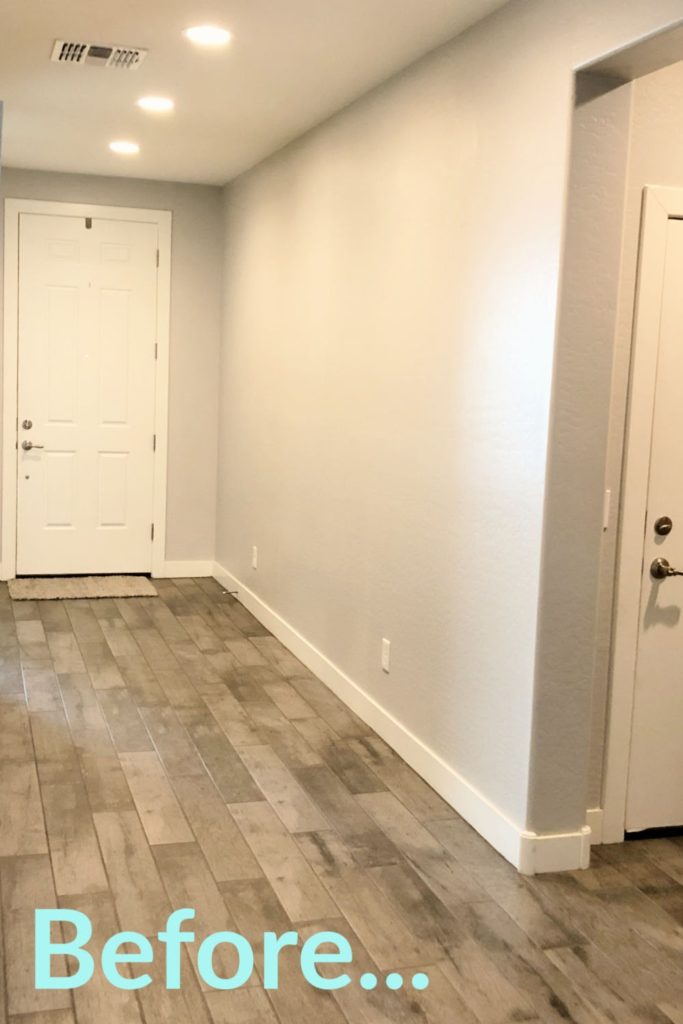
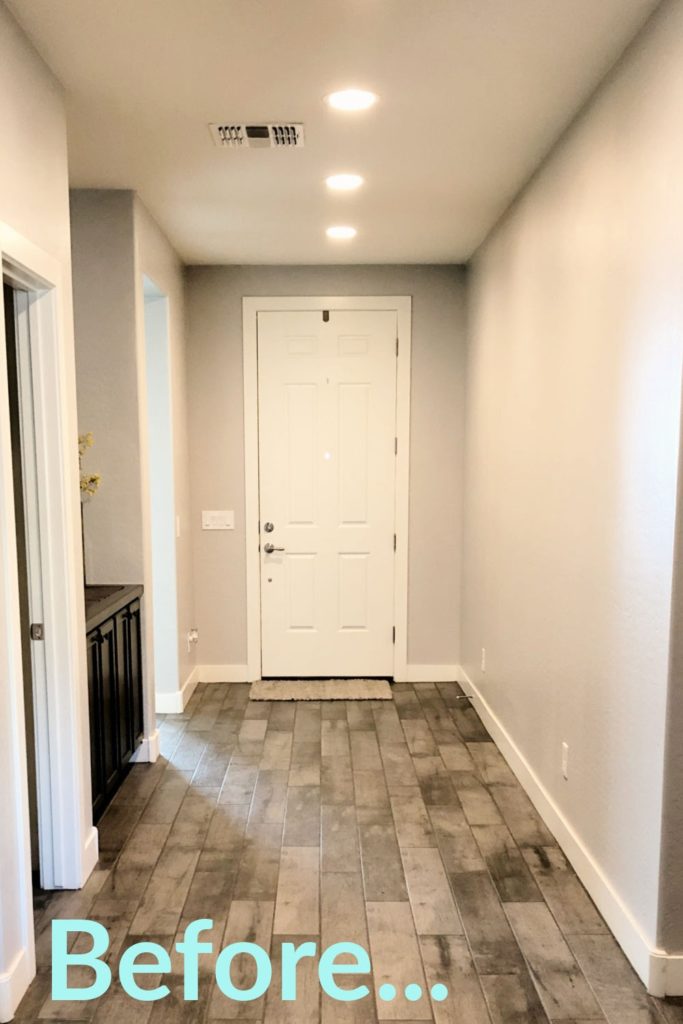
So when we were new home shopping and chose this home, I always knew what I wanted for this space. As you can see in the picture below we have a very long hallway with a BIG BLANK wall. I wanted to do a picture ledge here because, while I love gallery walls, I also like to change things up and didn’t want to put tons of nail holes in every time I want a change. I am not going to go into detail on each step but if you want to see what we did and the finished product… keep reading.
In total our entire shiplap wall makeover cost $315
Okay, I feel like I need to explain the cost. Yes, this project could have been done using less expensive materials and still had a similar look. No, we did not use those materials because we wanted a more “polished” look when complete. MDF was used not only for its durability, but also because of its ease of use. Straight boards without natural imperfections makes for easier cutting, sanding and painting.
So the whole project took us a couple of days and it was done in different stages. Day one was cutting and installing all of the shiplap planks. My husband started with finding and marking all of the studs with pencil lines. Installing required a chop saw, some adhesive, spackle, putty knife and an air nailer.
Working row by row, we opted for a completely random pattern with no specific lengths per board. As my husband installed each row, I went through with a putty knife and some spackle and filled all of the nail holes. While he cleaned up for the day, I started sanding the dry spackle to make it level with the boards.
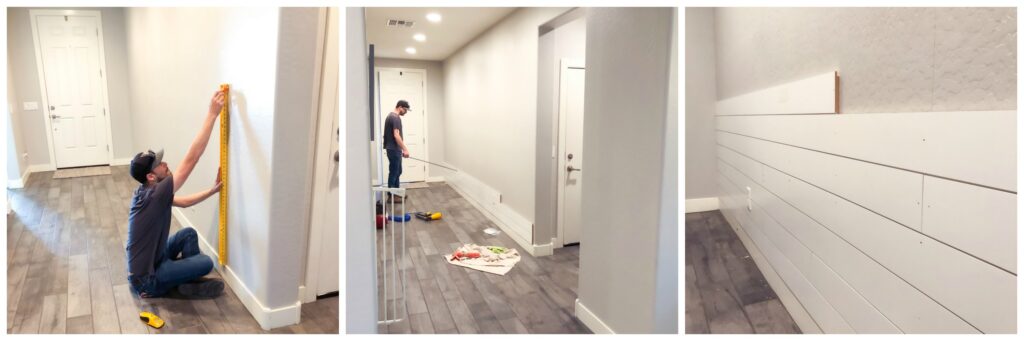
The next day was all about the picture ledge and trim. The picture ledge was installed with pocket-hole screws into each of the studs for added strength.
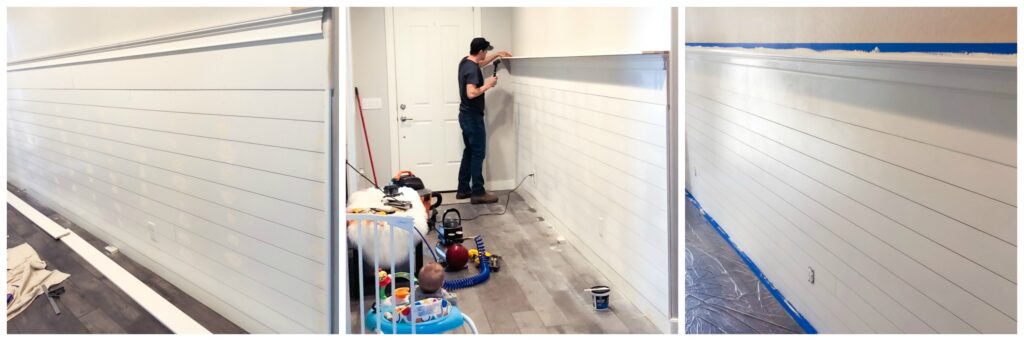
Ok so maybe it took a FEW days! On the third day we were able to paint the wall and install the hooks/pulls.
Finishing Hardware:
I found the hardware for my “hooks” on Amazon. These were the look that I was going for and were a great price. With the knobs that I used, I didn’t pay attention to the actual measurements of the threaded post (metric) this did make finding the needed hardware to install a challenge and my husband ended up ordering what we needed from a Canadian hardware store. It arrived fairly quickly, but it wasn’t something that we could find locally so it was our only option to still get to use my selected glass knobs.


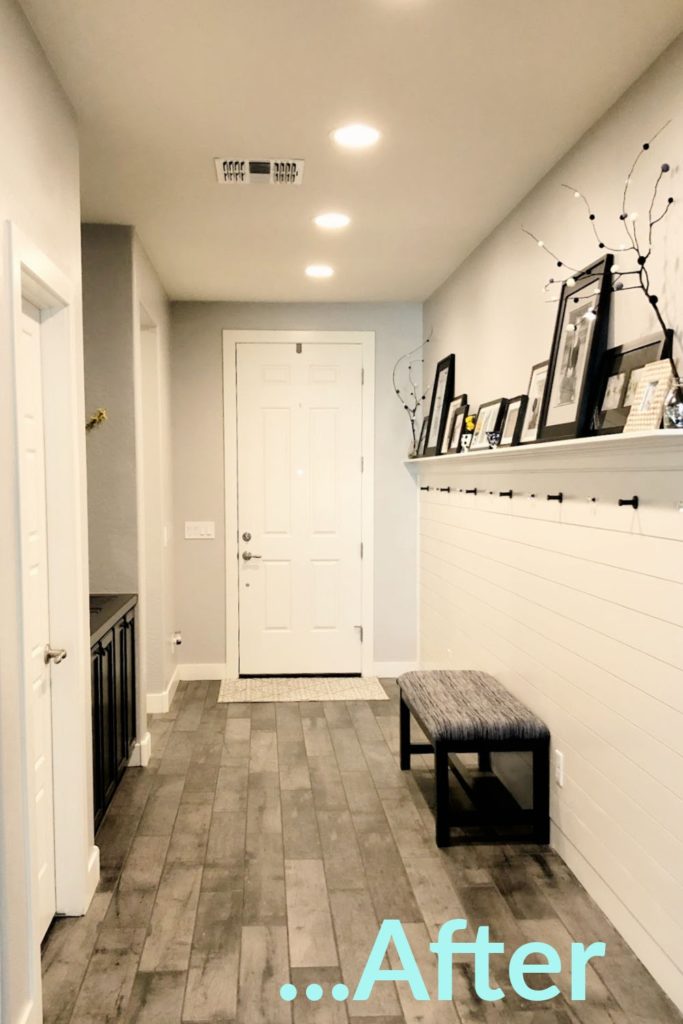
Overall I am thrilled with the was it turned out! I love having a place to hand season decor like stockings as well as place for our guests to hand their coats upon entering our home. What do you think? I’d love to hear from you in the comments section below.